Work Samples
A selected portfolio of content I have written and produced: lifecycle emails, social video, long-form blogs, and printed newsletters. Click any card to view the full piece.
Emails
Lifecycle & campaign emails
9 campaigns. Click to view the full email.

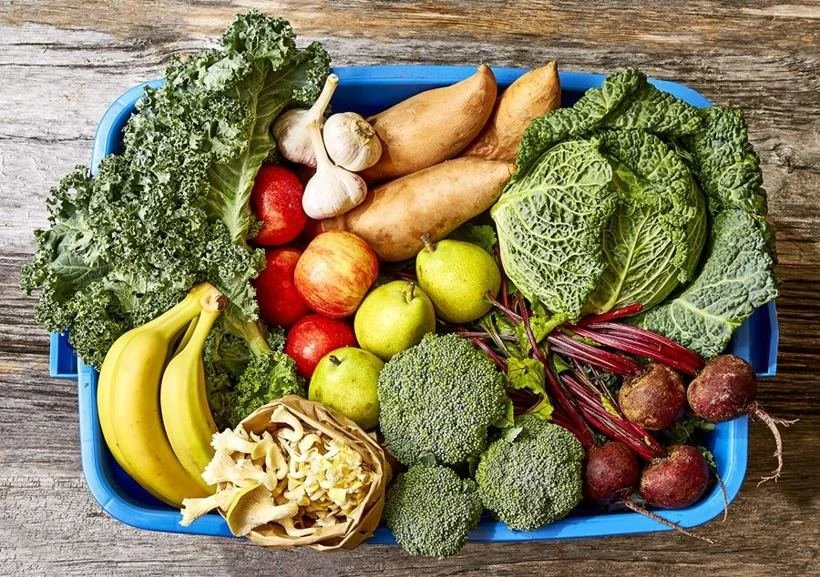
Make the Most of Your Produce Box
View full email →
Folks Behind the Food: Farming Mamas
View full email →
Every Month is Earth Month
View full email →
Hellooo, Spring!
View full email →
Omusubi Bar Suzume: A Two-Week Drop
View full email →
Haskap Me Up!
View full email →
Seedlings Are Back
View full email →
New in The Market
View full email →
A New Way to Shop Sustainably
View full email →Social
Social media
4 videos, personal and brand collaborations. Click to play the full post.

Bulgogi-Inspired Beef Burger
Concept, filming, edit
A build from the funemployment cooking series: bulgogi-spiced patty, kimchi onion jam, gochujang mayo.
Watch full video →
Shop Local All Winter
Concept, filming, edit
Why I have backed this Toronto produce box for five years, with a referral offer for a year of free eggs.
Watch full video →
Cardamom Cinnamon Rolls
Concept, filming, edit
Enriched dough, cardamom and cinnamon filling, cream cheese frosting. The full bake, start to finish.
Watch full video →
Zucchini Chicken Meatball Pasta
On camera, studio production by the brand
Pasta night upgraded with Premium Roasted Chicken Base, shot on set and published to the brand channel.
Watch full video →Blogs
Long-form blog writing
7 featured posts. Click to read in full.

Garlic 101: For the Clove of Garlic
Vampires begone! Garlic season is in full swing and we’re super excited to get our hands on this ancient vegetable (yes, vegetable!). It’s actually…
Read full post →
Super Successful Seedlings: A Foolproof Guide
I think it was Roald Dhal who said “those who don’t believe in magic will never find it” , and if you ask us, few things can top the magic of…
Read full post →
Food Waste Recipes: Make the Most of your Tops, Stalks & Peels
You’ve heard the sayings all before, 'one man’s trash is another’s treasure', 'a weed is just a flower that nobody likes', 'beauty is in the eye of…
Read full post →
6 Seeds Fit for Growing in Small Spaces
There are many bountiful benefits to growing your own food, but you need a backyard to make your garden grow, right? We’ve got good news, you can…
Read full post →
Top 10 Local Squash Varieties To Enjoy Right Now
Did you know that the leaves, shoots, stems, flowers, seeds, and fruit of a squash plant can all be eaten? And that it's believed to be cultivated…
Read full post →
Guide to Your Local Hydroponic Greens
We’d like you to meet the local hydroponic greens and their growers who are giving green machines a whole new meaning. Cultivating quality greens…
Read full post →
Regenerative Agriculture: Food for the Future
Have you ever met a farmer from the future before? Technically, neither have we, but we do know a few folks who are using some super progressive…
Read full post →Printed Newsletters
MEO Monthly Field Notes
Monthly printed newsletter. Click to view the full page.
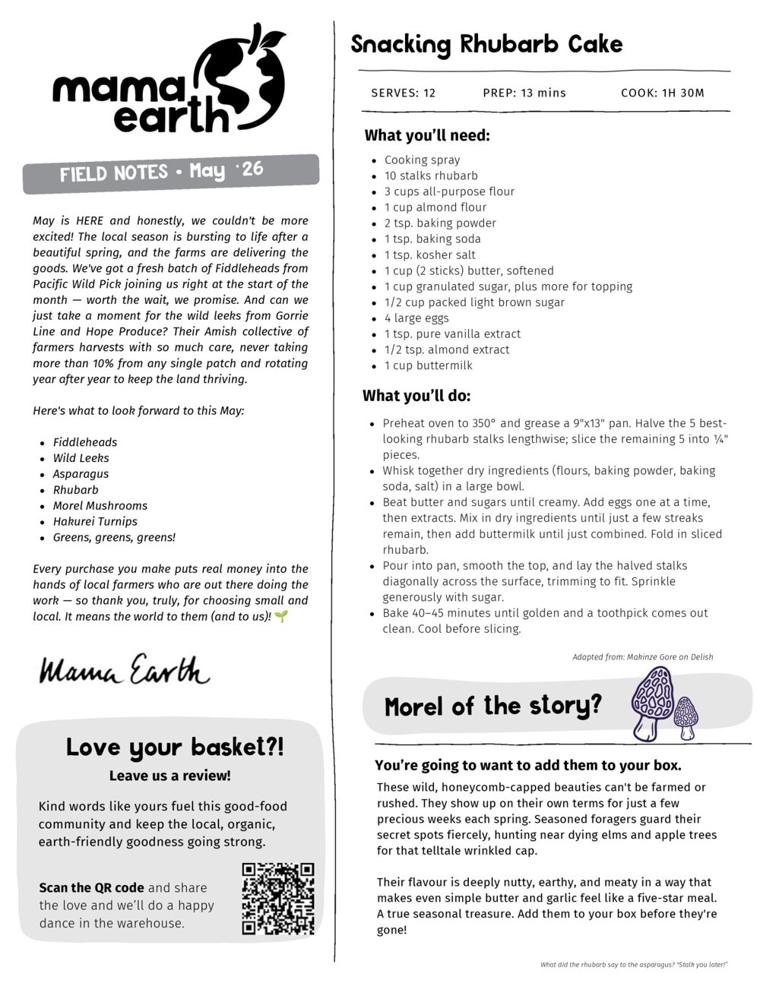
MEO Monthly Newsletter
Field Notes, May 2026
View page →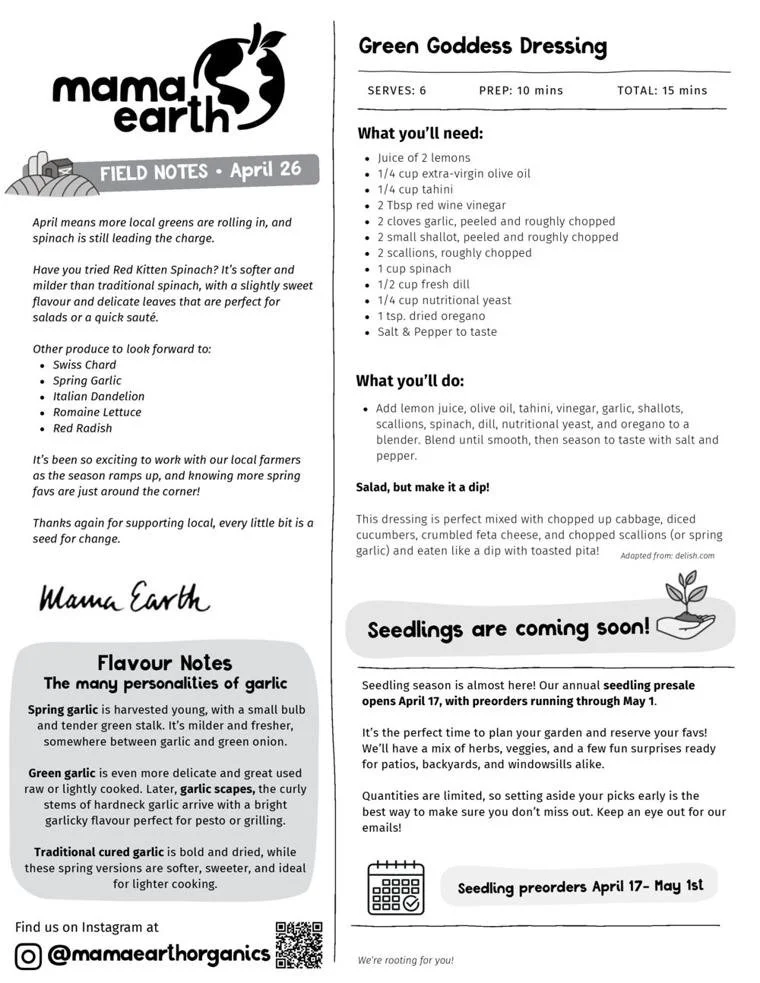
MEO Monthly Newsletter
Field Notes, April 2026
View page →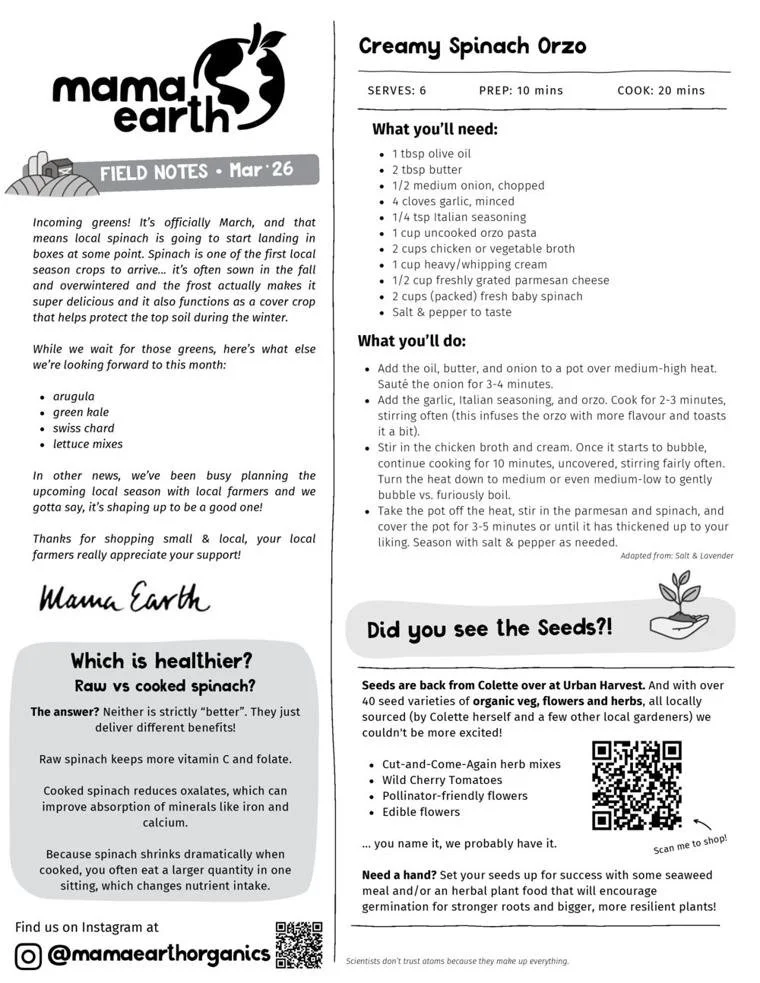
MEO Monthly Newsletter
Field Notes, March 2026
View page →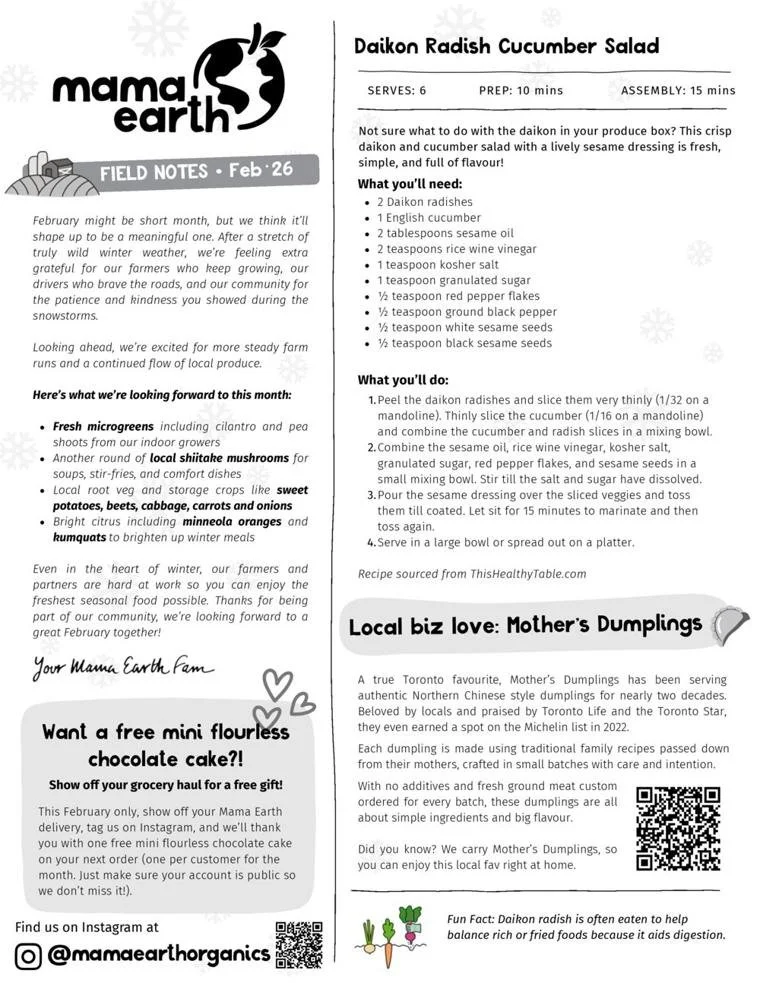
MEO Monthly Newsletter
Field Notes, February 2026
View page →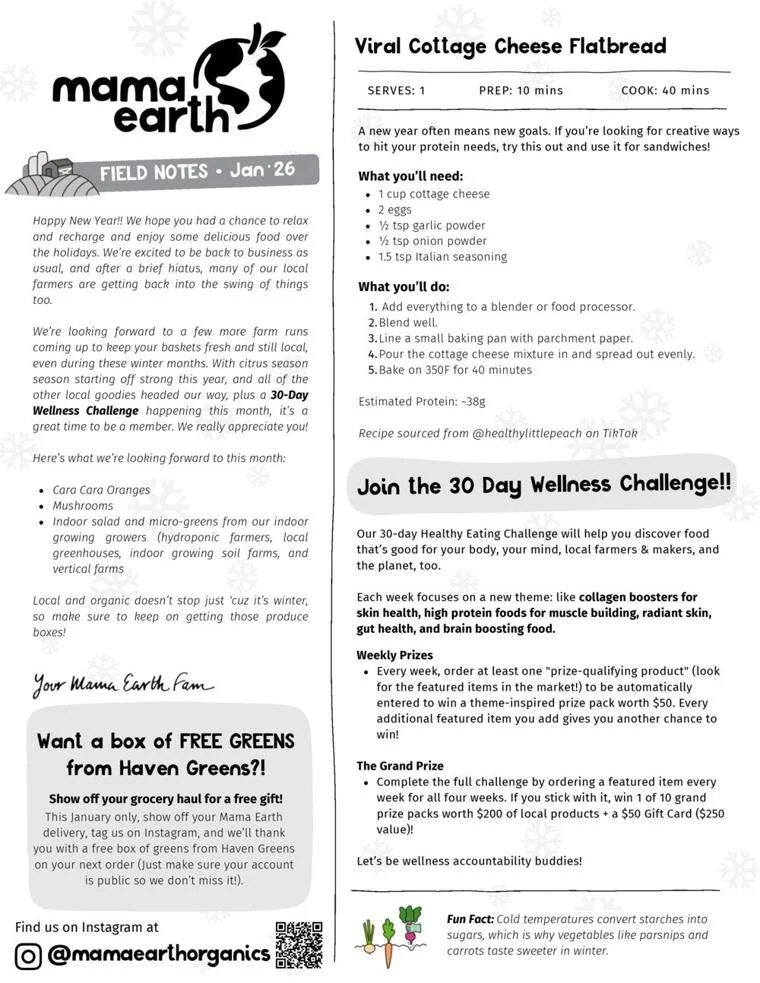
MEO Monthly Newsletter
Field Notes, January 2026
View page →Garlic 101: For the Clove of Garlic
Vampires begone! Garlic season is in full swing and we’re super excited to get our hands on this ancient vegetable (yes, vegetable!). It’s actually one of the oldest cultivated plants in the world, with historical evidence dating back over 5,000 years in Sanskrit records. Not only does it pack a punch in flavour, but it also has amazing nutritional value, containing many vitamins, minerals and antioxidants, too. It’s been used for ages as traditional and folk medicine, sometimes being referred to as "Russian penicillin" for its antibacterial properties.
Our farm partners looove growing garlic (almost as much as we love eating it) and it’s a staple ingredient in many cuisines around the world. Minced, chopped or crushed and used raw in salads or dressings, added to soups, sautéed, stir-fried, or roasted whole - it's great in pickles, sauces and adding an extra flavour element to mashed potatoes or any pasta recipe. But, there are so many ways to enjoy garlic beyond the delicious cloves we know and love. So, let’s get to know our friend garlic a bit better, shall we?

Garlic through the lifecycle
Garlic takes a long time to grow (about 140-160 days) and is extremely cold-hardy - some actually require a period of freezing to form large bulbs). And while you technically can plant from seed, most farmers prefer to plant the cloves instead because it can save you the 1-2 years needed to get sizable bulbs. But the best part about its longer lifecycle is that we can enjoy it in many different forms along the way - check it out:
Fall
Garlic is one of the few vegetables planted in the late fall to ensure a good harvest (October-ish usually), and take up to five months to grow into new bulbs! Farmers will often save garlic to replant each year, separating bulbs into cloves just before planting "pointy-side up" (as the broad base is where the roots will grow from). Garlic is surprisingly super competitive and needs to be planted 2-4 inches apart from each other to reduce the risk of competing with each other for nutrients.
Winter
The garlic goes dormant over the winter and while nothing super exciting really happens, for some varieties, the period of freezing is necessary to encourage bigger bulbs! It’s just a matter of timing it so that it’s planted early enough for the roots to sprout before the ground freezes but also late enough that the green sprouts won’t poke up above the soil until spring.
Spring
The greens start to sprout in the spring once the ground thaws, and farmers will harvest some of their crop as spring garlic (aka immature garlic -- we’ve all been there) before the bulbs fully develop. These are kind of look like green onions at this stage and have a delicious, more mild garlic flavour. They’re so versatile you can cook them, eat them raw, and use them in place of regular garlic, leeks or even green onions. And the best part about spring garlic is that you can eat the whole thing, whites, greens and all (without peeling!).
Spring Garlic
Summer
In early summer around June, the garlic plant will start to flower. The flower begins as a "scape" and must be removed before the plant actually blooms, to redirect the plant's energy into creating a bulb, rather than a flower. Garlic scapes used to just be discarded (or composted) by farmers, but have recently gained popularity among food lovers. What used to be an unused by-product of garlic growing has recently become a delicacy (and much appreciated early season income for farmers!).
Garlic Scapes
In mid-July (about 4 weeks prior to harvest), growers usually stop watering the garlic to allow the paper-wrapping to start to dry. In August, fresh garlic is harvested, and many will be “cured” for 2-4 weeks to dry and preserve their shelf life in the form of the papery bulbs we're used to seeing. A few will be set aside to replant again in the fall to start all over again!
Fresh Garlic
Different Garlic Varieties
Did you know that there are so many different varieties of garlic? While most grocery stores typically sell one variety of garlic (a.k.a. Music garlic) there are actually many different kinds of garlic all with varying flavour intensities and cooking applications - check out this nifty guide for some of the varieties we’ll be looking forward to later this season:
Our personal favourite is blanak garlic, which packs a flavour punch unlike any other, so if you're not used to cooking with blanak garlic, we suggest using half the amount you would normally use in your usual recipes (especially if you're using it raw).
How to Store Garlic
Whichever variety you choose, garlic is best stored at room temperature in an uncovered container in a cool, dark place away from heat and sunlight. These storage conditions will help prevent sprouting and should keep a whole garlic bulb fresh for several weeks to several months!
Tip: Garlic’s life span begins to decrease once you break apart the head and take out the individual cloves. A broken head will keep for about three to 10 days, so store them whole and make sure to use it all up before cracking into a new one.
Get to Know Your Garlic Growers
Hidden Hills is a newer partner of ours and they’re a small but mighty farm! When they bought the farm, a huge area of land had been clear cut illegally, but thanks to an Ontario Tree Planting grant, they’re working to replant trees and regenerate forest on their land. Last year they gave us some of their spring garlic, and this year we’re lucky enough to get some more spring garlic, scapes, and some fun varieties in the fall like Sweet Haven and Baba Franchuk.
We’re also looking at adding a new garlic grower on Pelee Island to the Mama Earth family! It might be kind of funny to picture your garlic growing on a farm and coming across on the ferry, but we love their approach to taking the road less travelled! Pelee Island has a super unique environment with a lot of diverse, and unfortunately at-risk species, including monarch butterflies that migrate there on their way to Mexico. The farm has 68 acres of land (mostly forest), and they donated some land to the Nature Conservancy of Canada to protect it for future generations. They grow their garlic on 6 acres and have a ton of different varieties! Stay tuned for more updates on this partnership!
Then there’s Samsara, one of our original garlic growers. They had a bad garlic season last year and had to save almost all of what they harvested to plant in the fall. But, their scapes are looking big and beautiful and JP is super excited and very optimistic about the coming season saying, “last year’s problems are not this year’s problems” and we’re super happy to hear it!
Because we didn’t have a lot of garlic last year, we reached out to everyone we knew and now we have so much deliciousness on the books for this year! So get ready to fulfill all your garlicky dreams with these amazing garlic recipes featuring garlic throughout the lifecycle (and yes, they’re worth the garlic breath)!
Garlic Recipes:
-
Grilled Garlic Scapes with Sea Salt
-
Garlic Scape Pesto Recipe
-
Pickled Garlic Scapes Recipe
-
Best Ever Roasted Garlic Recipe
Super Successful Seedlings: A Foolproof Guide
I think it was Roald Dhal who said “those who don’t believe in magic will never find it”, and if you ask us, few things can top the magic of watching a seedling sprout and thrive into a mature (& delicious) plant. And regardless of whether you started your own seeds or not, you’ve got seedlings that will soon be ready to take the leap and venture out into the world. And, like any good seedling parent would, you probably want to know how you can best set them up for success. Well, you’re in the right place.
We’ve put together a timeline of the key steps you’ll need to take, but before anything else, you want to make sure that your soil has warmed through and the risk of frost is behind you. An easy way to test this, is to stick your finger a few inches deep in the soil for a full minute. If you can’t do this comfortably, it’s still too cold. Thankfully 2021 has so far blessed us with warmer temperatures so we can likely (fingers crossed) start earlier than the May 2-4 usual.

5-7 Days before Transplant
Before transplanting outside, it is best to "harden off" your plants and introduce them slowly to the outdoors. Start by leaving your plants outside just for a few hours each day, and over 5-7 days gradually increase the amount of time they spend outside. This will help the plants learn to adapt to things like wind, direct sunlight, and changing temperatures, to ultimately reduce the shock they’ll experience when you transplant them. And if you’re moving plants in containers from inside to the great outdoors, it's best to harden them off the same way.
1-2 Days before transplant
It’s best to water your seedlings 1-2 days before transplanting so that the soil is moist (but not wet!) when transplanting. Moist soil will hold together and make it a lot easier to remove the seedlings from the container and plant into the ground.
Day of transplant
If you forgot to water your seedlings in advance of your planned transplant day, don’t try to cut corners by watering them just before transplanting, it’s much better to push your plans back by a day or two instead.
Plan for a morning transplant (or early evening) to avoid adding the stress of midday sun to the plant’s moving day.
When transplanting seedlings into the ground, always dig a hole twice as big as the pot for your seedling. And if you’re adding compost, mix that with some of the soil you've just dug out, and add enough back into the hole so that the seedling will end up at the right height (level with the ground or slightly below). If you’ve already built good organic content in your soil, simply add back some of the loosened soil to the bottom of the hole. Adding a seedling to loosened soil will help encourage the roots to spread out, and reduce any soil compaction in your planting area.
Remove the plants from their pot by placing one hand widely over top of the plants (try to spread out your fingers and slide them between the stems of the plants, to reduce the chances of crushing them). Tip the pot over, and if the plants don't fall out on their own, give a gentle shake, squeeze the side of the pot, and/or tap the bottom to slide them out into your hand. Then place the plants into the hole you dug out (root side down of course!) and give a gentle push down to encourage the soil to settle.
Once settled, fill in the rest of your hole and gently press down the soil around the plant again. This gentle compression helps to reduce the space for air and gives the roots better contact with the soil, to keep them from drying out!
Always water heavily immediately after transplanting, and regularly (allowing the top inch of soil to dry out between waterings) for a few weeks after transplanting.
Once the first couple of weeks are behind you and they've successfully transitioned to growing in the ground and your watering schedule can be adjusted.
Watering
Overwatering is just as dangerous as not enough water. Plants breathe through their roots, and that can’t happen if they’re surrounded by water! While different plants have different water requirements, a good rule of thumb for plants growing in the ground is to actually wait for signs of wilting (again this is after the few weeks post transplant transition!). It sounds a bit harsh, but most plants are fairly deep rooted so even when the top of the soil seems dry, the soil further down can actually be holding a lot of moisture.
If you’re watering more sensitive plants like herbs and lettuce, which you don’t want to push to the stage of wilting, it’s best to water from the bottom up. Simply water the dish that the pot is in (assuming your pot has a drainage hole) vs from the top of the soil down.
*A note on timing of your watering:
In the morning, you can water the whole plant. You’ll have enough time for the water to seep into the soil and off of the plant leaves before midday to reduce scalding (and also evaporation).
If you can’t get it done in the morning (or you’ve forgotten or been away) evening works okay too, just try your best to water at the base of the plant if you can. In the evening, the residual water on the plant leaves doesn’t have a chance to evaporate or run off and will increase your risk for mildew.
Don’t forget that your container plants are more susceptible to the elements and will dry out more quickly than what’s planted in the ground so be sure to check on them daily in the heat of the summer (a drainage hole will be your best friend in helping reduce the risk of overwatering). But where container plants may be more high maintenance, they’re also more flexible, and can be brought inside on a cold night or even moved into a shady spot if there’s a crazy heat wave.
Some other things you may want to consider:
Mulching
Many plants do really well having a layer of mulch applied once they've grown up a bit. Mulching not only helps the soil retain moisture and regulate temperature (carrying the overnight coolness into the afternoon, and the afternoon warmth through the evening), but it also helps to suppress weeds! Many different materials can be used for mulch, dry leaves, straw and wood chips are the most common ones. When mulching, make sure to leave a few inches of space around the base of your seedlings (otherwise you may cause the stem to rot), and mulch to about 2-3 inches deep.
Row Covers
These are a farmer's best friend but relatively unknown by home gardeners! It’s basically a piece of light fabric that allows sun and water through (an old bed sheet works great!), but acts as a barrier to bugs and birds. It's often light enough that you can place it above your freshly planted seeds, just germinating seedlings, or growing plants (some will prop them up to give the plants a bit more room to grow).
Beyond pest protection, it also has a small greenhouse effect, and can help retain heat and moisture. It can be used for frost protection later in the season, but it’s usually removed once the plants reach a decent size, as they can hold in too much heat in the summer (if you’ve ever camped in a tent in the summer, you get it). Besides, many plants benefit from the work of trusty pollinators to help them fruit!
Check out this trusty guide for a general idea of timing for different plants and their lifecycles to know when you’ll be ready to harvest. Happy growing!! And if you have success with your gardens this year, as always - send pics!
Food Waste Recipes: Make the Most of your Tops, Stalks & Peels
You’ve heard the sayings all before, 'one man’s trash is another’s treasure', 'a weed is just a flower that nobody likes', 'beauty is in the eye of the beholder', and, last but not least, 'save the Earth, revive your tops, stalks & peels' (it’s a new one we’re going with, and like Gretchen, we’re really trying to make it happen!). Most qualified folks agree that food waste is the last of the environmental ills that nobody's really talking about. With something so important as the Planet at stake, we’re here to do something about it! After all, our farmers are working really hard to bring us the best of the best, so make the most of your planet-saving, local-supporting basket (& save a few bucks, too!)
So, save those scraps (& this blog post) and create some delicious food waste recipes instead!
A few weeks ago we shared a post about how to repurpose broccoli stems on social media and we got some great ideas from our community. Here are a few of our favs:

-
Save your kale, broccoli and cauli stems to roast into fries, yes that’s right, fries (don’t forget the mayo or this date-sweetened ketchup with your fries.
-
Grate broccoli or cauliflower stems to use in a slaw or to create a simple, but delish veggie rice. Simply grate and sautée and serve as you would rice!
-
Or, keep it easy and peel the broccoli or cauli stems, slice those babies up like you would carrots, and snack away with a yummy dip from our market.
-
Chop up kale, cauliflower, and broccoli stems and cook them with anything - stir fry, pasta sauce, soup, risotto, the skies the limit!
-
Or maybe you’ll choose to be uber prepared and peel, slice and freeze those stems. Then, when you’re ready, add your frozen stems to smoothies, soups, sauces (it can be our little secret!).
We also dug a little deeper into our recipe scrap books (we went there) and found some fun inspo for other food waste recipes for you, too.
One of our fav recipes, maybe ever, is kale chips, you can bet we use the stems too! And did you know, you can use your cauliflower leaves? Even swiss chard!
Check it out!
STALKS/STEMS:
Kale or Cauli Leaf Chips
-
8 cups torn kale or cauliflower leaves or swiss chard (you can finely slice your kale stems to cook alongside your chips or save them stems for more inspo below!)
-
4 tablespoons extra-virgin olive oil
-
3 teaspoons coarse or fine sea salt
-
small handful of nutritional yeast (gives it a cheesy flavour)
-
sesame seeds for sprinkling (optional)
1. Preheat the oven to 375 degrees F.
2. Wash leaves and tear into bite-sized pieces, rinse your stems and finely slice. Make sure your pieces are dry after washing.
3. Divide olive oil between 2 baking sheets and sprinkle with half of the sea salt (1 1/2 tsp) and the nutritional yeast. Spread oil and salt around the tray (the entire tray should be well coated with oil so you may need to add more).
4. Place leaves and stems on the baking sheets. Using your hands coat with oil and salt (some people call this massaging the kale, just don’t massage the stems). Once coated, spread the pieces out so none are touching. You can’t crowd the leaves or some pieces won’t get crispy.
5. Sprinkle with remaining sea salt.
6. Bake for 10-12 minutes at 375 degrees, but watch as cooking time will vary depending on size and shape of leaves. Stems might take a little longer depending on thickness.
7. Remove from the oven and sprinkle with sesame seeds. Enjoy!
Kale Stem Inspo:
-
Chop your kale stems and sautée them with garlic, ginger and soy sauce
-
Blitz your kale stems into a delicious pesto to add to pastas, sandwiches and more
-
Quick pickle them by placing chopped stems into a mason jar. In a pot on the stove, bring a 50/50 mix of water, red wine vinegar and a sprinkle of cane sugar just to a boil, stir to dissolve the sugar and pour over the stems. Let cool and refrigerate!
It's summertime so we know you’ll want to mix up some fun drinks on the patio to go with these veggie-inspired, enviro-loving recipes. Make your drinks pretty by using up your herb stems and citrus peels in ice cubes for your summer cocktails, your homemade lemonade or even your cold teas.
Simply place herb stems (think basil, rosemary, lavender, mint) in trays, fill with water and freeze. Do the same with your citrus peels. Fancy and useful!
PEELS
While we’re on the topic of chips, why not make chips with your normally composted potato, carrot and beet peels?
-
Press the peels between a couple of sheets of paper towel to remove excess moisture.
-
Place pressed peels on a cookie sheet and drizzle with avocado or olive oil.
-
Sprinkle with salt and paprika and toss to coat.
-
Bake until the peels are crisp, about 30 minutes (might vary depending on the size of your peels and the veg peels you’re using).
-
Serve as a snack, as a side, or on top of a salad. We love them best served with Mad Mexican’s Chunky Guac.
Citrus Peel Cleaner:
Collect any citrus peels in a jar (lemon, grapefruit, orange, lime etc)
Cover the peels with white vinegar & let them sit out in a cool dry place for about 3 weeks.
After 3 weeks is up, strain the peels and use the citrus-infused vinegar on tough mess or dilute with water for a great natural all-purpose cleaner!
One last tip before we let you dig into these recipes, don’t forget about your garden beds! You’ve got to try this nourishing banana peel tea for your garden.
1. Keep a large mason jar full of filtered water in your fridge. Whenever you eat a banana, cut the peel into smaller pieces and throw them in the water.
2. After about a week, leave it out in the sun for 10-12 hours, strain and use it as a compost tea for your garden. It’s a natural fertilizer and pest repellant.
3. You can also save dehydrate the banana peels, and blend them into a powder (a coffee grinder works great here, a few grounds are also great for your soil!).
4. Sprinkle the dehydrated peel into your garden (this is also great when you’re starting seedlings! Add a pinch to each seedling to feed the soil and deter pests)
TOPS:
Carrot Top Pesto is a really great way to use up your carrot tops! Here’s a simple recipe to follow:
-
½ cup raw or toasted pumpkin seeds
-
2 cups carrot tops, washed and roughly chopped
-
1 clove garlic, pressed and chopped
-
1/2 cup olive oil
-
sea salt and pepper to taste
1. Add pumpkin seeds to the bowl of your food processor or blender and blend until like crumbs.
2. Add garlic, carrot tops, garlic, and olive oil and blend until smooth, or until it reaches desired consistency.
3. Season with salt and pepper.
4. Serve with crackers or flatbread.
Pro tip: this works for basically any top! Radish tops, beet greens, turnip tops - you name it, you can turn it into a pesto.
Using up every last bit of the ingredients in your fridge and fruit bowl is an amazing goal, and we're always on the lookout for ways to make saving the Earth even easier. If you’ve got some ideas to share, be sure to join us over on Instagram and share your ways! We love learning from our Mama Earth fam.
“Cutting food waste is a delicious way of saving money, helping to feed the world and protect the planet.” – Tristram Stuart
6 Seeds Fit for Growing in Small Spaces
There are many bountiful benefits to growing your own food, but you need a backyard to make your garden grow, right? We’ve got good news, you can actually grow food in small spaces like balconies, patios or any space really! A little sunlight, a lot of dirt, some seeds, a bit of luck and you’re good to grow.
In the interest of making things easier, we’re highlighting our top 6 picks for seeds that are best suited for growing in small spaces. We’ve also got some great general tips in case you’ll want to get a head start indoors in the coming weeks.

-
Keep soil moist until seeds have germinated but don’t overwater once they sprout.
-
Ensure lots of light, good air circulation, and keep those babies keep warm.
-
Heat mats work well if they’re in your gardening budget.
-
Humidity is your friend. Keep seeds under a dome and you won’t need to water as much (you can use an upside-down plastic bottle with the top cut to create a dome if you need to!).
-
LED grow lights and a fan will make a huge difference in your journey to healthy robust seeds started indoors. Bonus: they’re not too pricey!
Small Space Gardening Tips:
-
Grow shade-loving veggies.
-
Plant in window boxes, or areas that maximize what light you do have.
-
Hang planters on your balcony railings to save on floor space.
-
Make the most of sunny spots, plant vertically if you can!
-
Make your planters mobile little sun chasers.
-
Get plenty of hanging baskets – leafy greens, certain varieties of strawberries, tomatoes, and herbs all do particularly well in hanging baskets.
We've got a whole bunch of seeds available in our market (with more on the way!) but below we've rounded up our top 6 picks for veggies well suited for growing in small spaces. Truly, these veggies are for everybody and can be grown pretty much anywhere regardless of your growing space, but these babies below will help you take the extra fuss out of it.
Merveille De 4 Season Lettuce
Formally known as Merveille des Quatre Saisons this is a soft, wavy, and buttery type of lettuce. This plant has loosely cupped pale leaves with subtle but beautiful shades of ruby, rose-pink and bronze - definitely one of Mama Nature’s works of garden art! It is a variety that is perfect for sowing in practically all seasons and is especially ideal for baby greens.
Merveille des Quatre Saisons is happy as can be in a pot which makes it perfect for small space growing. You can plant this lettuce all season long! You really just need some dirt, some sunlight, and water!
Bonus: Merveille lettuce stands up to a dry hot summer (hello, Ontario summers). Dress them lightly with one of the dressings from Mama’s Kitchen.
Korean Mint
Korean Mint has beautiful purple flower spikes that will add colour to your small space from midsummer to fall.
As a kitchen herb, its flowers and its leaves are edible. We recommend using them in stir fry dishes and salads. You can use the leaves for tea, fresh or dried.
The leaves taste like spearmint and licorice and help with digestion when taken as tea. How cool to grow your own tea herbs!
Korean Mint likes lots of sun so consider planting in a spot that gets lots of sunbathing hours. Quality soil is always better for our gardens, but this plant is pretty easy-going and can tolerate some dryness, especially once on the grow! This baby needs to be in a pot, or it will take over everything.
Bonus: Bees, hummingbirds, and butterflies love Korean Mint!
Basil Genovese
Who doesn’t love basil? It’s one of the easiest herbs to grow, and yup, it’s also perfect for small-space gardening.
Basil’s hardy large leaves have a sweet and mildly spicy flavour. This basil is excellent for pesto, Caprese salads, and other dishes that require large, fresh basil leaves.
Have you tried a basil and blueberry smoothie? Trust us on this one!
Basil likes lots of sunlight, rich soil, and regular harvesting. Make sure you gently remove the flowers as they grow.
Bonus: Basil pesto freezes beautifully so you can enjoy it year-round after getting an awesome crop of basil on your patio. Use your ice cube trays to freeze the pesto, once frozen place in a sealed container and freeze for up to 3 months.
French Breakfast Radish
These little root vegetables are known for their elongated shape, bright red skin, and crisp white flesh. But did you know that French Breakfast Radishes have been enjoyed in France since the 19th century? They were originally grown as a winter crop, but now they're available year-round and are a staple in French cuisine. These radishes are crunchy and slightly spicy, with a refreshing bite that pairs perfectly with butter and salt. If you like sweet, these radishes become even sweeter in flavour after a frost!
Shishito Peppers
Shishito peppers are small, green peppers that occasionally pack a bit of heat, although even the hottest ones are actually pretty mild. They’re perfect for nibbling on when you’re harvesting from the garden, but we recommend cooking them.
Pan fried or grilled on the barbie and lightly seasoned, shishito peppers will become your go-to side once your garden grows! We also think they’d be perfect on pizza night!
Shishitos like fertilizer, they don’t need a ton of water, and they grow best in containers or raised beds. Sound pretty simple, don’t they?
Bonus: If you’re someone who takes the time to pickle, you could try slicing your shishito pepper harvest like jalapenos and canning them. They’re the perfect charcuterie accompaniment.
Ruby Red Chard
Ruby Red Chard is not your average leafy green. With its stunning ruby red stalks and dark green leaves, it's almost too beautiful to eat. But once you take a bite, you'll be hooked. This colourful chard is packed with nutrients like vitamin K, vitamin A, and vitamin C, making it a superfood that's as tasty as it is healthy. Plus, it's incredibly versatile. You can sauté it with garlic and olive oil, use it in a stir-fry, or even chop it up and add it to your favourite salad. It's also incredibly easy to grow. After 30 days you'll have your baby chard harvest, but it's only 60 days to wait for fully mature leaves.
Fun fact: Did you know that Ruby Red Chard is actually a variety of Swiss chard? It's true! Swiss chard comes in a variety of colours, including red, pink, orange, and white, but the Ruby Red variety is one of the most striking. And if you're looking for a way to use the entire plant, don't throw away those beautiful red stems! They're just as nutritious as the leaves and can be cooked and eaten just like any other vegetable.
And remember, have fun as you watch your garden grow!
Check out some of our own gardening inspo on our blog including a beginner's guide and how to set yourself up for seedling success!
Top 10 Local Squash Varieties To Enjoy Right Now
Did you know that the leaves, shoots, stems, flowers, seeds, and fruit of a squash plant can all be eaten? And that it's believed to be cultivated from as far back as 8000 B.C.? Turns out, humble local squash is also seriously impressive, and with 10 different varieties available right now, we’ve got our hands (and stomachs) full of all things squash.
This year, in particular, squash is having a real moment. Jess from Lunar called us saying that she had 2 crates worth of squash in the fields to be harvested, but then once she got to harvesting it turned out to be 6 crates worth (and that was just butternut!). So yeah, squash is firing on all cylinders on all farms and we've been busy planning out our local squash schedule with our farm partners to make sure everyone's covered. We’re pretty sure we’ll look back on this time one day and say “yep, 2022 was a great year for squash”.
Check out the local varieties of squash you can enjoy right now!
Squash is in peak season right now, but some of them are here for a good time, not a long time. Not all squash are good for winter storage (especially the delicate ones like delicata and spaghetti), so keep reading for the full rundown on all of our favourites that are ready to enjoy right now.
Acorn Squash
Botanically it's a fruit but this winter squash is classified as a vegetable. This mildly sweet and slight nutty squash lasts 2-3 weeks at room temperature whole and unwashed, or 3-4 weeks in a cool, dark and dry place. Not only is it best for baking or roasting (usually with the skin on as the flesh easily comes off after cooking) but also tastes great when sautéed, steamed, puréed (soup-style) and mashed.
Buttercup
Discovered by chance in 1925, the Buttercup squash is often considered the sweetest of the winter squash. It gives you a creamy, caramel-y and nutty flavour and is super popular as a steamed or stewed vegetable. The flavour of these squash improves with storage (the starch gets converted to sugar) and tastes best after 1-2 months’ storage post harvest.
And don’t forget to save the seeds - these ones are super great for snacking, much like pumpkin seeds.
Butternut
This thin skinned squash has a dense flesh that’s moist and tender with sweet and nutty flavours. In fact, it gets its name because it’s smooth as butter and sweet as a nut! They’re best stored in a cool, dark place and should last for 2-4 weeks.
Butternut is the real MVP of squash! You can do just about anything with them! They can be roasted, sautéed, toasted, grilled, or puréed for soups. Juggle them, sing to them, you name it! Or go an entirely different route, and they can be mashed and used in casseroles, breads, muffins, and pies or diced and used in lieu of potatoes or added on top pizzas and flatbreads.
Honeynut
Honeynut is sweeter than butternut, but with a moist firm flesh, and a rich, malty, caramel flavour. Honeynuts are best when roasted at a high temperature, caramelizing the squash and bringing out its inherent sweetness and flavour.
Pie Pumpkin
Best known for its use in baking, especially in pies, breads and custards, the pie pumpkins have quickly become one of the popular staples. This has a lot to do with their long storage life (they can be stored whole for 3 months after harvest or after being cooked, for up to 6 months in the freezer!). They don’t disappoint flavour wise as well with mildly sweet and earthy notes. Popular legend has it that it was one of the earliest cultivated vegetables in North America.
Delicata
Everyone's favourite squash (at least around here anyway!), delicatas are sweet and creamy with a flesh that's firm and moist and tastes a bit like corn and sweet potatoes. The soft tender skin is also edible, which saves a lot of hassle on the prep! Cut it up and roast it or cut in half longways, roast and stuff it with all of your favs for a seriously delicious dinner.
Spaghetti
After a good roast in the oven, a fork helps to reveal long noodle-like strands that stand up to your favourite sauce. Did you know these unique “noodles” were actually discovered (or at least first recorded) in China, wayyy back in the 1800s!? Spaghetti squash has made quite the comeback in popularity lately with its low-carb-pasta-alternative claim to fame. But beyond this, it’s also celebrated as an excellent source of fibre, vitamin A, folate, and folic acid, too!
Did you know that spaghetti squash can be frozen for 3-6 months after being cooked? It’s super easy to batch cook and have it ready for whenever you’re looking for that quick and easy dinner.
Sweet Dumpling
This small winter squash is the perfect size for an individual serving (they’re usually the size of a large apple). It’s got a smooth texture with a slightly sweet flavour that puts the sweet in sweet dumpling if you know what I mean. This squash is typically baked or roasted with the skin on it because it can be a bit tricky to peel them with all the nooks and crannies. So save yourself the hassle, and if you’re into it, go ahead and enjoy the skin, too!
Psst! If you’re stuck on what to make with them, they work really well in any recipes that call for sweet potatoes or pumpkin.
Mashed Potato Acorn Squash
A rarer cousin of your traditional acorn squash, this all-white acorn has a creamy white exterior and flesh. Low in sugar, the squash takes on the appearance of mashed potato when cooked & fluffed and is a good low carbohydrate alternative to mashed potatoes.
Acorn squash is rich in vitamins A, B, and C, minerals like potassium and magnesium, as well as dietary fibre and antioxidants.
Tetsukabuto
Farmers don’t often pick favourites in the field, but the tetsukabuto squash is basically an organic farmer’s dream. It’s one of the easiest crops to manage, highly disease resistant and produces more ‘fruit’ (aka squash) per plant than the other varieties. If that isn't enough, it also has the longest storage life of any of the winter squash varieties. When properly cured, it can store way past April (to be honest, it’s never lasted long enough around here for us to test the true longevity).
How to store squash:
Whichever squash you choose, maximize the flavour experience by storing them on your counter (out of direct sunlight) where they can be on display for 2-3 weeks (storing in a cool dark place (but not your fridge) will buy you some extra time). If you don’t eat it all at once, be sure to store cut pieces in the fridge and enjoy within the week.
Whether you choose to carve them, roast them, mash them or soup them, promise me one thing: you’ll save and roast the seeds (a little olive oil and salt and pepper at 375 F is all it takes!).
Shop the full local squash experience over in our market!
Guide to Your Local Hydroponic Greens
We’d like you to meet the local hydroponic greens and their growers who are giving green machines a whole new meaning. Cultivating quality greens that are quite literally out of this world (even NASA is using them in their space missions!), these farms are paving the way for closed-loop sustainable growing methods that are revolutionizing the way we think about food. In order to wrap our heads around it, we’re instead thinking inside the farm. A key piece of our local farm fam, we’ve gathered everything you never knew about indoor farming and the good folks behind it.
What are hydroponic farms?
The simplest answer is an indoor farm that uses a water-based growing medium instead of soil. It’s a sophisticated closed-loop system that’s wildly efficient and makes big strides in support of a more sustainable circular economy (more on this shortly).
Growers have complete control of the climate, water and light conditions. Using special LED lights, automated irrigation and nutrient delivery, as well as air handling units to adjust the temperature and humidity, every variable is optimized to encourage the plants to be the very best versions of themselves! This also means growers are able to produce hydroponic greens without adding chemicals that are harmful to people and the environment while increasing the efficiency of their water usage!
Hydroponic farms are actually incredibly connected to Nature.
Cesar, the head grower at GoodLeaf, is extremely passionate about what they’re doing and we like to think he says it best:
“Given we grow indoors, it might seem like we're detached from nature, but that could not be farther from the truth. Plants are sentient beings, and they only grow optimally if a complex set of conditions are met. Only through the deep understanding and management of nature's biotic and abiotic interactions and processes can we obtain the results we need.”
Makes sense that you have to be even more in tune with the intricate relationships and specific needs of your plants when you’re the one responsible for providing everything. Imagine what his houseplants must look like!
Why farm indoors?
Glad you asked.
There are actually a number of benefits to farming indoors, and most of them have to do with sustainability. Indoor farms allow you to grow up, which means you can plant more plants in a smaller footprint (kind of like a condo vs having each of the units on their own plot of land).
But, a smaller land footprint is just the beginning. By being in complete control of the climate conditions including sunlight, warmth, humidity etc they’re actually able to produce their hydroponic greens 30-50% faster than a traditional farm (which is another way of saying they’re growing 30-50% more produce in the same amount of time!). It’s amazing what you can do when you’re not contending with the severe or unpredictable weather.
Removing the weather wild card also allows them to grow uninterrupted year-round so that we can continue enjoying many fresh locally grown greens despite the record snowfalls and deep wind chills we saw this winter. And while all our local farm partners make our world go round, we’re especially grateful for these farms during the winter months when the local selection naturally dwindles… AND of course, this year, in particular, has brought wild supply chain disruptions which are making it even more challenging to count on growers from further away. We really can’t say enough about how much we appreciate all that they’re doing!
Hydroponic farms are also extremely efficient with their water usage and almost every drop is saved and repurposed. This happens by recycling their supply through a fancy closed-loop filtration system that captures all of their runoff and filters it to be reused again and again!
No harmful chemicals! Controlling everything in the environment means eliminating the need for added substances that are harmful to the environment (and people too!). While not certified organic, all of the greens from our hydroponic growers are pesticide, herbicide-free and non-GMO.
Another myth is that indoor farms don’t produce the same nutritional quality items as those grown in soil - totally false! Since they’re able to so finely tune their environment and nutrient delivery, and harvest so close to home, many of their products actually pack more nutrient density - of course, not all hydroponic farms are created equal (don’t worry we’ve done all of the vetting so you can enjoy and leave the work to us!).
Who farms indoors (& what are they growing?)?
We the Roots
We the Roots is a hyperlocal partner of ours that couldn’t get any more local if they tried, we’re literally neighbours! Yep, located right beside the Mama Earth Intergalactic Headquarters you’ll find an indoor hydroponic farm that sells their greens with the roots still attached for optimal freshness. Not to mention virtually zero food miles in bringing the greens from where they are grown, to where your order is lovingly packed by Mama Earthlings.
Backed by years of plant science, Gordon and the We the Roots team have been growing boutique greens for many of Toronto's top restaurants (chefs love their quality and flavour), all using 2% of the water a traditional farm would and zero pesticides. With the impact on the local restaurants that we’ve seen these past few years, they’ve had to pivot and, lucky for us, didn’t have to look very far!
Arugula is by far Gordon’s favourite crop because of its distinct spice profile and ability to enhance many types of dishes. And he’s super fond of their We the Roots arugula in particular and says you’ve likely never tasted arugula that packs this much of a punch before (we tend to agree!). Check out the full We the Roots lineup!
A former journalist, Gordon is also able to make the perfect rice without a measuring cup. Every. Single. Time. And of course, we asked him who he’d invite to his dinner party (surprisingly his famous rice didn’t make the menu!). Who would've thought?
“The next Maple Leafs captain to lift the Stanley Cup is welcome over for dinner anytime. Victory steaks and a special We The Roots salad sound like a good start…”
Maybe this could be his year?!
Vision Greens
Located in Welland, Ontario, Vision Greens was founded by 4 retirement age friends with the sole purpose of leaving a positive impact on the world before they're gone (you’ll still find Oliver, in the harvest room helping the team prep their orders for the following day!). After the fourth e coli outbreak on lettuce in 2 years with little to no traceability, they knew there had to be a better way to provide Canadians with more sustainable nutrition that is grown close to where it's consumed. They chose indoor because it allows them to grow great, consistent produce 365 days a year, despite Canada’s weather.
The technology they use was originally developed for NASA at the University of Guelph to grow produce in space for astronauts with way less space! We love their commitment to sustainability to use 95% less water and 95% less land compared to traditional farming. Being local allows them to provide the freshest possible produce with a low carbon footprint and fewer food miles. Check out all of the Vision Greens items we've got this week!
As for their dinner party?
“If we were to have anyone over for a dinner party it would be the late Nikola Tesla because of his ability to bring innovation that can sometimes seem ahead of its time but is very much needed. Our sales lead, Mitch, has a passion for cooking great food for people so he has designed a 3 course meal which would be served at the dinner party.
The first course begins with a salad with a special crunchy spring mix consisting of our green leaf lettuce, red leaf lettuce, and red baby romaine, topped with extra virgin olive oil, honey balsamic vinegar, fresh oregano grown at our farm and a little bit of feta cheese from the local Welland dairy farmer. The main course would be a green bean casserole with shallot, mushrooms, sweet bell pepper, and topped with crispy fried onions. For dessert, we would utilize the strawberries we plan to grow at our farm to make the most delicious strawberry sorbet topped with our fresh Genovese basil which provides an elevated freshness to the dessert.”
(We’re on standby in the event Nikola Tesla isn’t able to make it.)
GoodLeaf
GoodLeaf is a hydroponic vertical farm, growing greens that are straight-up good (pun intended). Established in Guelph back in 2019, Goodleaf is all about bringing you your favourite fresh greens that are grown close to where you live, all year round.
For Cesar (the head grower at GoodLeaf), growing is simply his whole way of life. He grew up on a small farm in Argentina where they produced food for his family and neighbours, so it seemed like the most natural choice for him to continue to pursue agriculture in his university studies and career. This time though, he made the conscious choice to opt for indoor growing because of how it aligned with his personal values around sustainability. He says:
"At GoodLeaf, we’re producing high quality, nutritious food for our community, through a sustainable approach. It doesn’t resemble much the farming I did as a young lad, but I do it with the same passion since I know indoor farming has the same aim."
His favourite thing to grow is their Spicy Mustard Medley microgreens which he says has a flavour richness you just have to taste to believe. Keep your eyes peeled for more of his greens coming soon to our market!
If he could invite anyone over for his dinner party,
“I wish I could invite my mom. With my heart full of pride, in front of a table full of each of our greens, I would tell her 'Look how big the seed of love for agriculture that you planted in me, has grown.'"
Okay, who’s cutting onions?!!
While they’re all unique in their own way, at the heart of it, the resounding message we received from all of these hydroponic greens growers was the same. Constant innovation drives them to bring you the best of the best and the pride they feel in their products and what they’re leaving behind for the next generation is what really gets them out of bed in the morning, and we couldn’t be more grateful! We’ll leave you with some parting wisdom from Cesar.
"Choose wisely what you eat. Make conscious decisions about what you put on your and your family’s plate. It’s only through the consumer’s commitments to their own health and our planet, that agriculture will evolve towards a brighter future."
Here’s to the future of local food!
Regenerative Agriculture: Food for the Future
Have you ever met a farmer from the future before? Technically, neither have we, but we do know a few folks who are using some super progressive farming practices that are really ahead of their time. Regenerative agriculture is pretty much the ultimate win-win, because not only does healthy soil mean healthy and delicious food, it also has a great impact on climate change by helping to remove excess carbon from the atmosphere!
You may have seen our sustainable protein feature last week where we got to know more about our meat farmers and fisherfolk. This week, we’re getting to know some of our farm partners who are growing delicious fruits and veggies in ways that are going beyond sustainability and helping to regenerate the Earth.

But, before we do, let’s clarify what regenerative agriculture actually means!
Based on the name you could probably tell that it’s farming in a way that’s regenerating or rebuilding the overall ecosystem, and there are a few ways that this happens! Mainly by:
-
increasing biodiversity (growing more cool foods like cucamelons, dragon tongue beans and yellow watermelons!)
-
enriching soils (more nutrient-rich foods and less reliance on other inputs!)
-
improving watersheds (more efficient use of resources and less reliance on irrigation!)
And what’s so cool about all of this is that, in doing these things to support soil health and overall food quality, we’re also seeing more carbon being absorbed into the healthy soil from the atmosphere (basically working to reverse climate change) AND farmers are increasing their yields!
It’s important to acknowledge that the concept of ‘regenerative agriculture’ isn’t a new one - many indigenous communities have practiced this way of growing for hundreds of years. They’ve really set a great example about what it means to be in harmony with the Earth which is why we’re so excited to see others adopting this type of growing more today too!
Let’s take a look at these practises in a bit more detail and see how they come to life on the farm (and ultimately, your basket!).
Meet Nathan & Aleta!
While they both share a passion for farming, it was actually square dancing that brought these two together, and they’ve never looked back! Nathan started out working on a few research and education-focused farms (during which time he got a degree in Organic Agriculture from the University of Guelph) before the two of them got Nith Valley Organics up and running. Aleta actually grew up on a dairy farm and her skills on the livestock side of things seriously complement Nathan’s skills perfectly. They often see the same things through different lenses (the two of them can look at the same paddock of sheep and Aleta will spend more time looking at the sheep while Nathan is looking at the grass!).
But the main thing that they agree on is remaining focused on their soil! They try to limit the number of tractor passes that disturb the soil and increase the long-term organic matter content.
There are two key ways they’re making this happen:
The first is integrating livestock into their cover crop plans. Cover crops that restore soil nutrition are nothing new, but by adding livestock into the mix and allowing them to graze on the cover crops, Nathan is helping to rebuild the soil faster and more efficiently. Because, not only do the roots from the cover crops drive nutrients deeper into the soil, the livestock also add manure and increase nutrient cycling. The added bonus is that the livestock naturally… create... manure where they graze, which saves the farmer from having to bring the manure into the field and apply it themselves (and it also helps supply the feed at the same time!).
Another practice they’re super excited about is using deep mulch culture for their squash and garlic production! Adding a deep layer of mulch (wood chips) helps to keep moisture in and weeds out. This was super successful for them last year with crazy delicious squash to prove it - despite the drought! The deep mulch actually retained so much moisture for them that they didn’t even have to irrigate the field. It helped to save water in the short term while also increasing the organic matter in the soil, which helped to build the water-holding capacity in the long term!
Nathan’s always been the big ideas guy and loves experimenting with new ways to bring you the best of the best, but he credits Aleta for keeping them on track with the day to day to make sure everything gets done so that they can share their veggies with you! Their hard work doesn’t go unnoticed, and we appreciate them so much!
Meet Amy & Graham!
A science teacher and a chocolate maker walk into an ultimate frisbee tournament. No joke, it’s actually the beginning of Amy and Graham’s love story! After meeting, they went on to work together on environmental clean up projects and even WWOOFed (volunteered) on organic farms in Central America.
They’ve always been really into saving the environment and soon discovered that one of the most practical and productive forms of environmentalism could actually come from farming in harmony with nature.
The pair really learned by doing and eventually established Fiddle Foot Farms in 2011. They’re actually not certified organic, but that’s because they’ve gone above and beyond the Organic Standards and into Biodynamic farming territory! Amy says that one of the things that sets biodynamic farming apart from organic agriculture is the idea that they are farming towards creating a closed energetic loop - one where they’re able to generate the fertility needed right there on the farm. They’re making this happen by cycling nutrients on the farm with the help of a small herd of cows whose manure is collected to create a compost pile. Both her and Graham consider this the heart of their farm and they use it to create special biodynamic preparations (she likens them to homeopathic remedies) that help turn the compost into the ultimate soil health booster (and support the farm as a whole)!
Regenerative agriculture, to them, means farming in collaboration with nature and it enables them to use their farm as a vehicle to reverse climate change through many practices. Perhaps most exciting toGraham and Amy is the creation of nutrient-rich humus (not to be confused with hummus!). Humus is the dark organic matter that’s left over after plant and animal matter has decomposed) and helps the soil better retain water and nutrients and is ultimately their biggest driver in creating positive environmental change!
Who knew you could make such a difference by eating delicious food. Supporting farmers who are actively taking measures to look out for the soil and are growing food within your bioregion not only helps to provide you with fresher and more nutritious food, but it also minimizes the carbon footprint of food transportation. And, with regenerative agriculture farming working in collaboration with nature (vs at its expense) it can actually address many climate change concerns. So the next time you’re unpacking your basket and enjoying good food, take a moment to thank our farmers and give yourself a pat on the back for making it happen. Because we can’t be us, without “u”!
(& because the Earth’s worth it!)